
How to Import Tests from Excel into Testuff
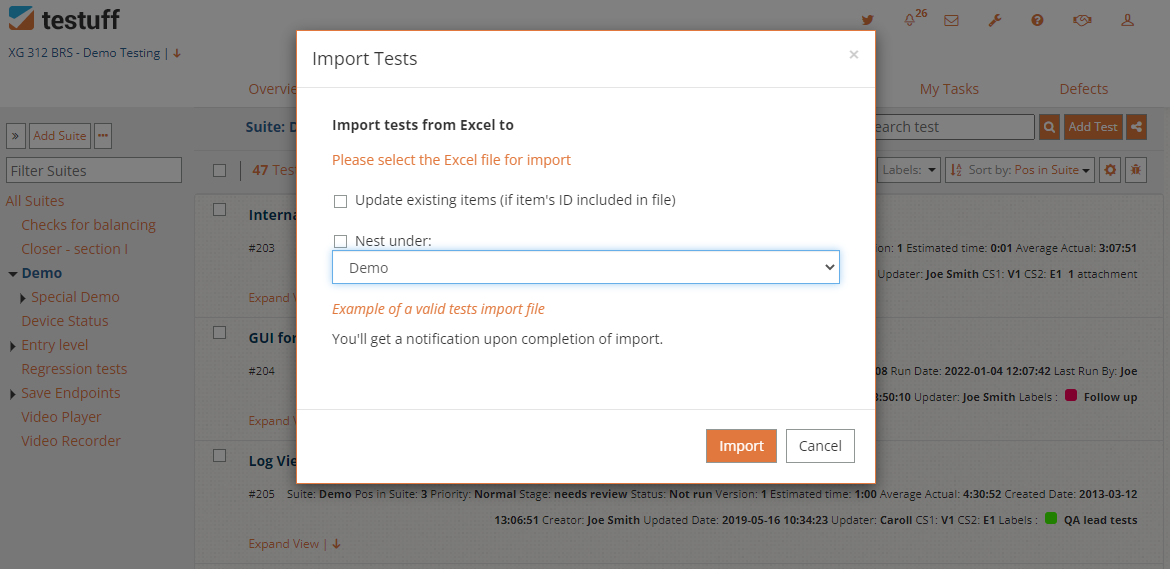
To successfully import tests from an Excel file into Testuff, follow these steps:
Preparing Your Excel File
- Arrange your Excel file:
- Download the sample file: click here to download an example of an import Excel file.
- Sheet name: Ensure the sheet name corresponds to the project name
- Header row: The first row on each sheet should contain the header line with the column names.
- Populate the Columns:
- Suite names: Enter suite names in the first column. Ensure there’s no other information on the same row as the suite name. There’s no need to repeat the suite name in subsequent rows.
- Test names: Enter test names in the second column. Repetition of the test name in subsequent rows is unnecessary.
- Preconditions: Place preconditions in the third column. Each precondition should be on a separate row, aligned with the corresponding test name. Note that only one precondition can be added per test.
- Test steps: List test steps in the fourth column, with each step on a separate row.
- Expected results: Place expected results in the fifth column, next to the corresponding test step.
- Properties: Enter Priority, Estimated time, and category parameters in the Properties column, separated by commas.
- Labels: Include any labels in column J. Follow the format provided in the sample file.
Importing the Excel File
- Initiate the Import:
- Access Import Option:
- Go to the Tests tab and click on the three dots menu option. Then select Import from Excel.
- Go to the User Settings to import tests into a new project (the project will be automatically created).
- Choose the File: In the pop-up window, select the Excel file you wish to import.
- Additional Settings:
- Nest Under: If the tests belong to a sub-suite, tick the checkbox Nest Under and select the parent suite.
- Update Existing Items: If updating existing tests, tick the Update existing items checkbox and provide the test ID for each test in the spreadsheet.
- Importing Process:
- Start Import: Click the Import button to begin the process.
- Preview: An HTML preview of the imported Excel file will be displayed. Ensure it matches your data. If it doesn’t, click Back and correct any mistakes in your Excel file before retrying.
- Final Steps:
- Final Confirmation: Click Import to finalize the import process.
- Project Branching: Projects will be created based on the sheet name. If a project already exists, a new branch called “Excel import” will be added with the imported data.
Additional Information: Import is also available for requirements. Read more here.
Desktop-client Note: To import tests into a new project, start the import process from the home screen by clicking on the Import from Excel link. The project will be automatically created.