
 Watch Tutorial
What is a requirement?
Requirements define the behavior of the application in broad strokes and are usually outlined by the product manager. The requirements’ main purpose is to make sure everything the application is supposed to be doing is covered in the testing process.
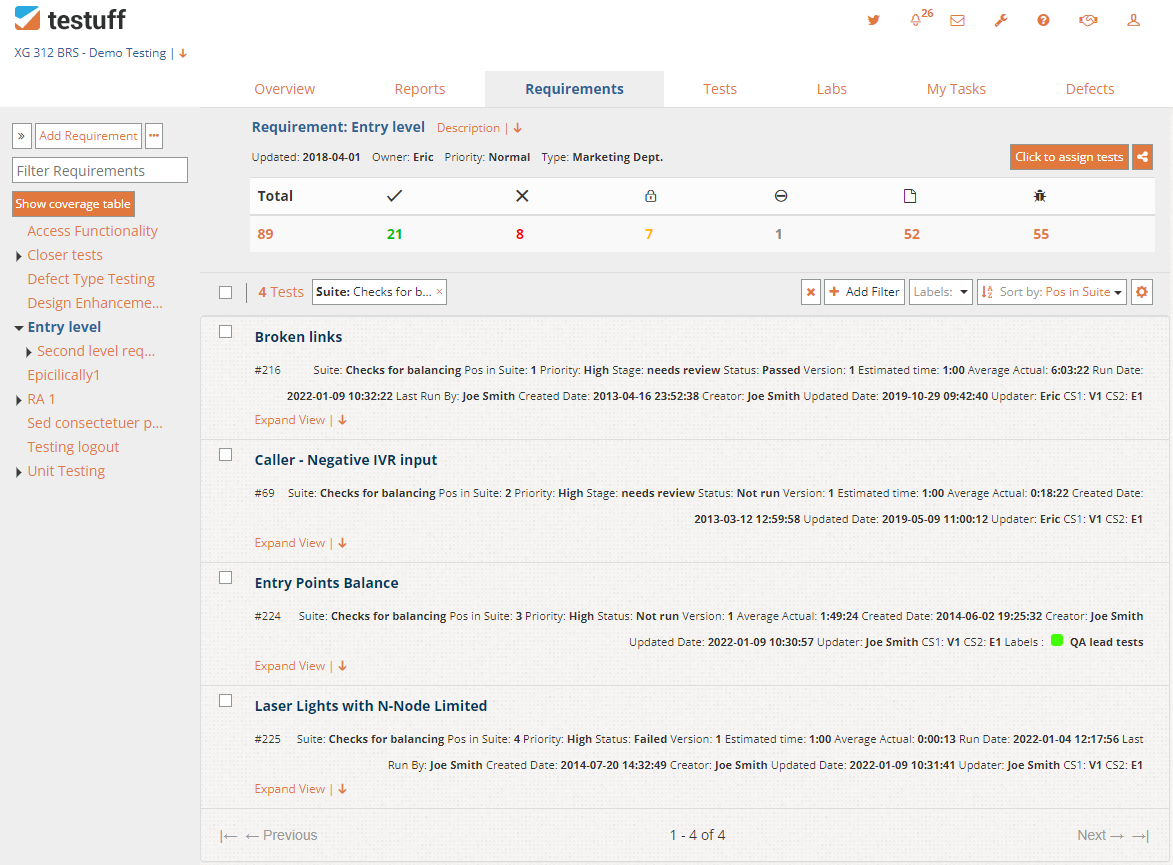
How does Testuff handle requirements?
Creating Requirements
- In the Requirements tab, click the Add Requirement button to open the Create a new requirement editor.
- Enter the requirement name, description and attach any relevant files.
- You can set values for the requirement’s fields: Priority, Risk, Type, and Owner.
- Save the new requirement and continue adding others.
- Sub-folder structure is supported, allowing you to add sub-requirements to existing parent requirements. Click on the More actions menu option, and select the + Add Requirement option.
- You can add multiple requirements, by using the Quick add many option from the More actions menu option. A Quick Add Requirements popup editor will be displayed.
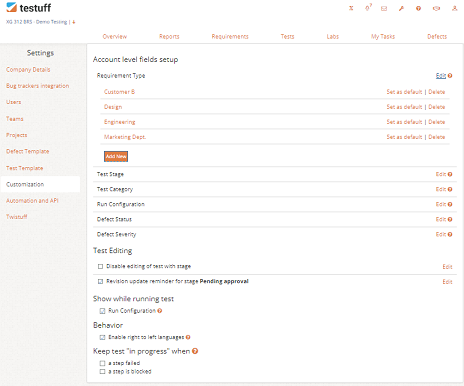
Can I setup different requirements types?
Go to Settings select Customization and click the Edit link, next to the Requirements type. Add the necessary types, and they will be available for use in your requirements.
Linking suites
The link creates a dynamic linkage between the suite and the requirement. Any change to the suite tests will be automatically reflected in the requirement’s assigned test list.
There are two ways to link a suite to a requirement:
- From the Requirements screen:
- Select a requirement in the Requirements page.
- Click on the More actions menu option and choose Link suites. This will open a Link suites popup window
- Click on the Add link to Suite where you can select a suite from the list of current suites, or create a new suite and link it.
- From the Tests screen:
- Select a suite in the Tests page.
- Click on the More actions menu option, and choose Link requirements. This will open a Link requirements popup window.
- Click on Add link to requirement and the list of available requirements will be shown.
- Select a requirement from the list and click on the Link button.
Assigning tests
To assign tests to a requirement:
- Click the Click to assign tests button, on the top right.
- Select a test, or a group of them, and then click on the Assign button.
- Tests can be also assigned to requirements from the Tests screen. Check mark a test and click on the More actions menu option for it. Hover the Link to requirement menu option and all the requirements available will be displayed. Click the requirement in the list, and the test will be assigned to it.
AI-Powered Test Creation
AI-Powered Test Creation allows you to generate well-structured test cases directly from your requirements.
By analyzing user stories, acceptance criteria, etc., the AI proposes relevant test cases with steps, expected results, and data hints. It also improves coverage by suggesting edge cases and negative flows that might otherwise be missed.
The generated tests can be edited, accepted as is, or regenerated, ensuring they fit seamlessly into your workflow.
This option is available from the requirement’s menu under the option “Generate AI Test.”
Running tests
You can run your tests directly from the Requirements screen. Hover a test and you’ll see the Run icon. You can also choose to assign the test (or multiple tests at once) to a tester in your team. While doing that, you’ll be able to also select a Lab, from the list of existing labs.
Can I add/edit information for my requirements?
In the Requirements screen, click on the More actions menu, on the right of the selected requirement, and then select the Edit menu option for updating the requirement information.
Can I Track Changes Made to a Requirement?
Yes, the Audit Trail feature allows you to view all changes made to a requirement. You can access this by selecting Audit trail  icon.
icon.
Can I import my requirements?
- Prepare an Excel file according to the import guidelines provided:
- The first line on each sheet should have the header line containing column names.
- Requirement name should appear in the first column. This is the only mandatory column.
- Description can be used to add information about the requirement. It should appear in the second column.
- ID can be added in the third column, if used. This should be used for existing requirements, ones you wish to update. You can get the IDs from the requirements export file.
- Right of the Add Requirement button, click on the More Actions menu, click Import from Excel.
- From the Import Requirements popup window, you can download a sample Excel file, or Click here to download it now.
- Choose the Excel file you wish to import.
- Click Import to start the process.
Working with Requirements
Beyond creating and managing requirements, Testuff allows you to:
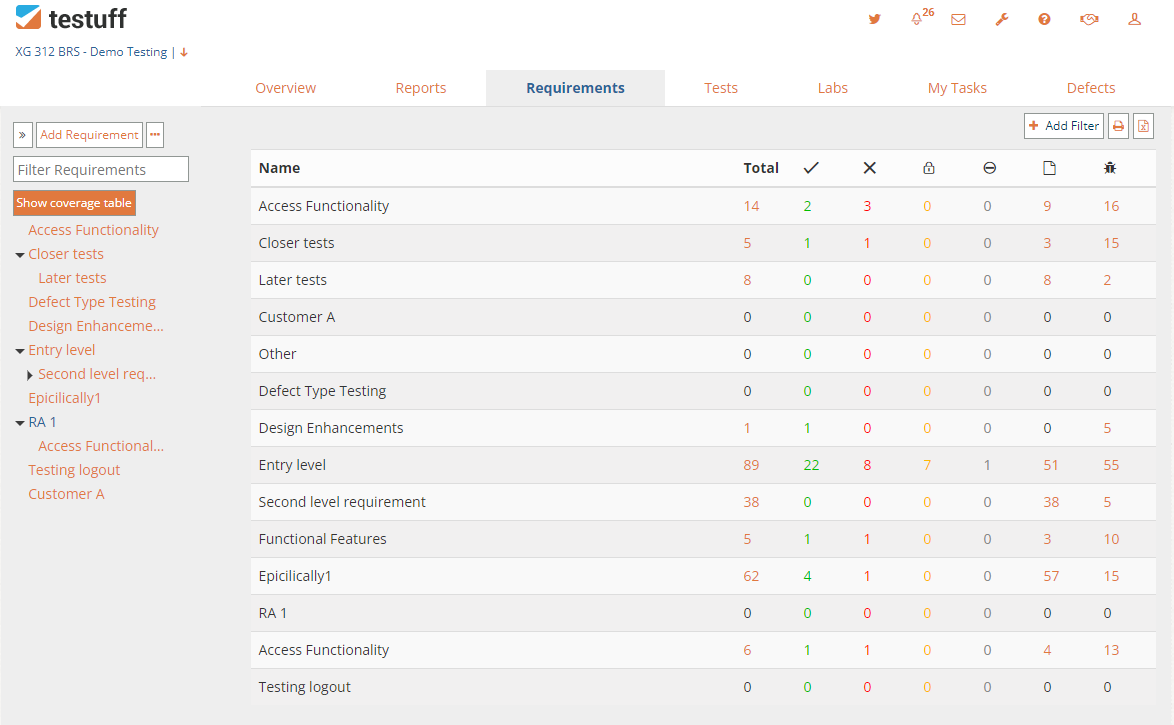
- Monitor Coverage: Click on the Show coverage table button to see current status of all the requirements. Follow the status, the total runs and the amount of defects found of each requirement.
- Follow up requirements: The Reports include various reporting options on requirements, allowing you follow up on status, progress, activity and more.
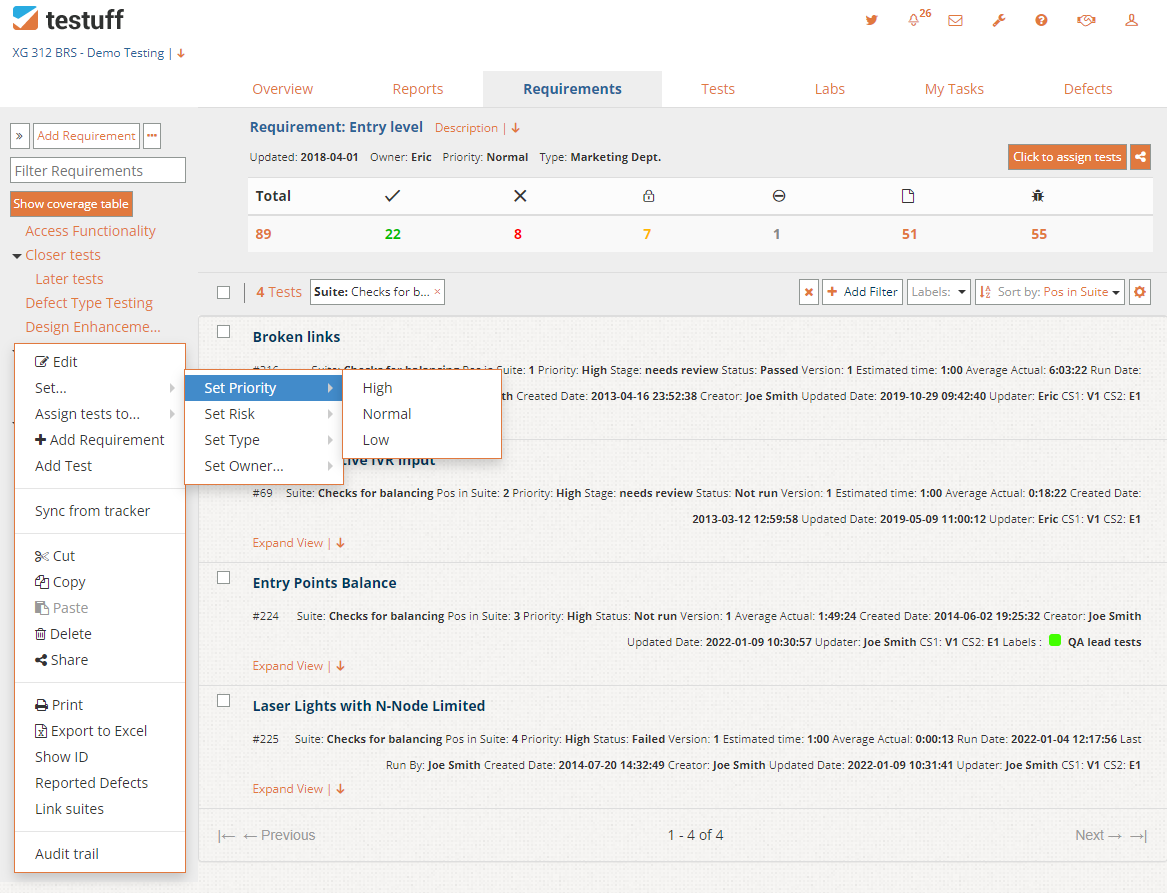
- Set fields values:
- Priority
- Risk
- Type
- Owner
- Assign tests to testers: This option allows also to Select Run Configuration, Merge Selected Configuration or even Add New Configuration that will be used in the requirement for the assigned test.
- + Add Requirements.
- Add Tests, to the tests list, edit your testing tree.
- Edit tests parameters and attributes.
- Run tests and report defects.
- And more…
How do I integrate my tracker’s requirements with Testuff?
From the Requirements screen:
- Click the 3 dots more menu, next to the Add requirement button.
- From the menu, select Import from tracker.
- Now, enter a tracker issue/ticket ID, or a few of them separated by commas.
- You can choose to nest the imported requirement under an existing one.
- The tracker imported requirement can be synchronized for changes made in the tracker on it. Open the requirement’s menu, and select Sync from tracker.
Desktop client note: Right-click the requirement’s name to open it’s menu options list.