
 Trac Website
 Trac Website
How Does Testuff Integrate with Trac?
Testuff can automatically send every reported defect to your Trac account, even though it is a hosted service. This allows you to run your manual tests in Testuff while continuing to use Trac for bug tracking.
How to Configure Trac with Testuff
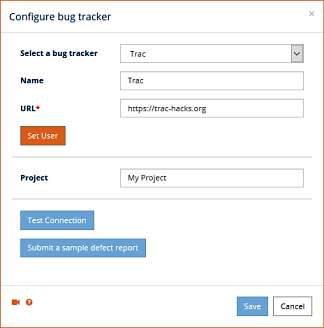
- Access Bug Trackers Settings:
- In Testuff, go to Settings and select the Bug Trackers menu option. The Bug Trackers integration page will display.
- Click the Add bug tracker link.
- Select and Configure Trac:
- Choose Trac from the bug trackers list.
- Fill in the Trac server address in the URL field. This should be the Trac URL, omitting any file names that may appear after the last slash.
- Set the Default Project. Defects exported from Testuff projects that do not have a custom Trac project will be exported using this project name.
- Test the Connection:
- You may click the Submit sample link to ensure Testuff can create bug reports in Trac. If all goes well, the new bug report should be displayed.
- Don’t forget to click OK to save the settings.
Associating a Custom Trac Project with a Testuff Project
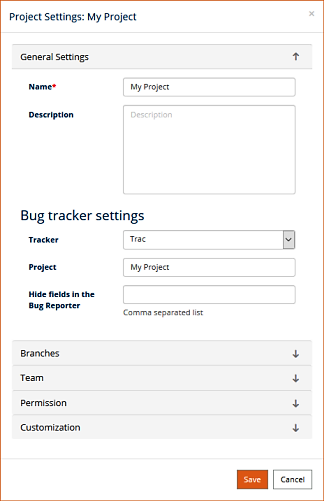
If you want to export defects from a specific Testuff project to a specific Trac project, follow these steps:
- Access Project Settings:
- Go to the Settings menu option at the top of the screen.
- Click on the Projects option and select a project by clicking on the Edit link next to it.
- Configure Trac for the Project:
- Under the General Settings section within Bug tracker settings, ensure the Tracker field is set to Trac.
- Fill in the Trac project for this Testuff project.
- Click the Save button to save the settings.
For any additional help with integrating Testuff with your Trac, please contact us.