
Managing the Defect Validation Process in Testuff
In Testuff, you can manage the defect validation process. Below is a possible process you may want to follow, which you can adjust to fit your workflow:
- Reporting Defects: Defects are typically reported while executing tests. Sometimes, a defect can be reported independently of any test. In both scenarios, you’ll have a group of approved defects that are designated for fixing.
- Fixing Defects: Regardless of whether defects are managed within Testuff or a separate bug tracker (e.g., Jira), Testuff integration ensures seamless status updates between tools. When developers fix a defect, they update its status in their bug tracker, and this status change will be reflected in Testuff, indicating that the defect is now awaiting validation.
- Validating the Fix: To validate the fix, the QA lead or manager sends the defect for validation by automatically creating a designated-validation test. This is how it’s done:
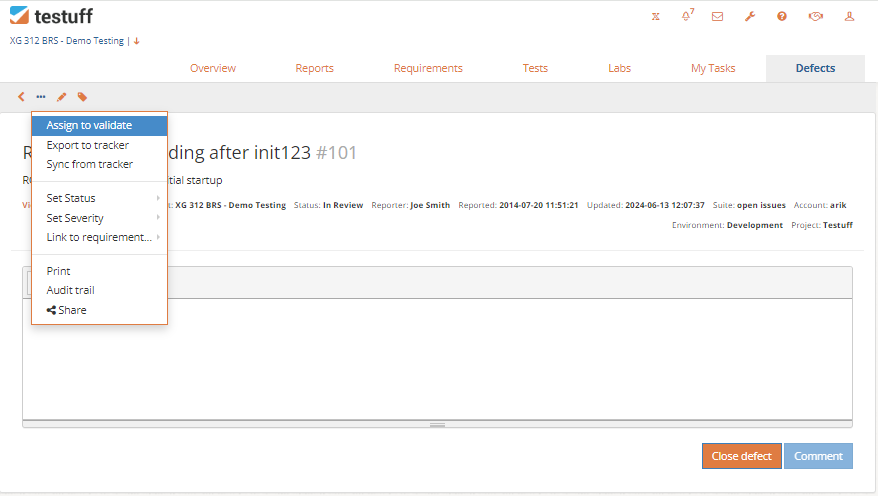
- Defects screen: Select a defect, or a group of defects, then open the menu and select the Assign to validate option.
- The test created during this process includes a link to the defect, and it can be edited to add further testing and validation instructions.
 When assigning the defect for validation, you can choose the lab, the tester, and the suite to locate the test.
- Finalizing Defect Status: If the test passes, the defect can be set as Closed, otherwise it is Reopened, possibly with a comment on it, explaining the reason for that.
 When assigning the defect for validation, you can choose the lab, the tester, and the suite to locate the test.
As mentioned, you may want to fine-tune this process to align with your organization’s specific workflow and procedures. Whether or not you use a bug tracker, and the flow between QA and the Development team, will influence how you manage this process. The above description provides a solid starting point.