
How are tests organized in Testuff?
Tests in Testuff are structured using projects, branches, suites, and labs, giving you flexibility in how you manage your test cases based on your needs and methodology. Experiment with different configurations to find the one that works best for your team.
Projects
A project typically represents a product, a significant feature, or a specific client, particularly if you’re working on outsourced projects. Aligning your Testuff projects with your bug tracker’s projects or products is advisable to ensure seamless integration and bug tracking.
Managing Projects
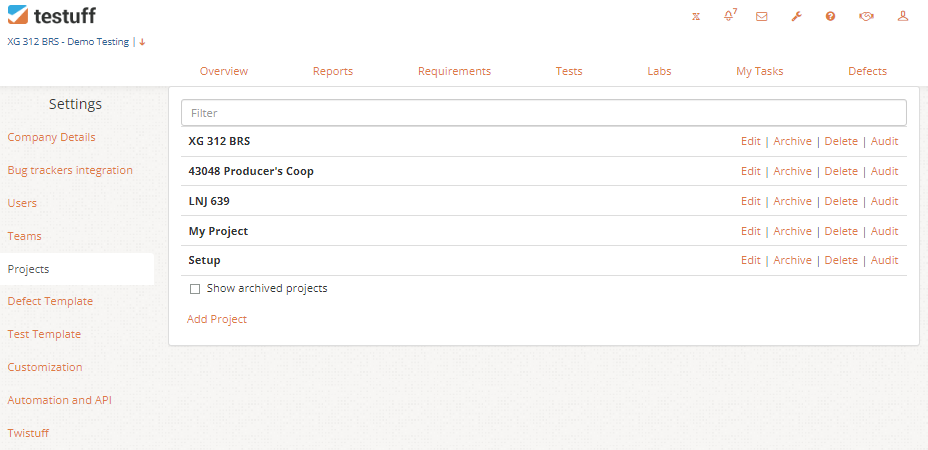
Access your projects list, and from here you can:
- Add a New Project: Click the Add Project link, enter the name, and save. You can also copy settings from another project and set an integrated Bug Tracker.
- Edit a Project: Click the Edit link next to the project name to modify its settings, including general settings, branches, team, permissions, and customization of different project level fields.
- Delete or Archive a Project for better organization and control over active projects.
Branches
Branches represent different versions or iterations of your application under test (AUT) within a project. Each branch can evolve independently, allowing you to manage changes in your test cases as the software progresses.
Managing Branches
Navigate to the Project settings, and select Branches to manage existing branches or add new ones.
You can:
- Add a New Branch: Click the Add Branch link and optionally copy all tests from an existing branch.
- Rename, Delete, or Archive a Branch to keep your branches organized.
- Merge Branches if needed to re-organize your test cases.
Managing projects and branches is limited to ‘Admin’ and ‘QA Lead’ users
Suites
Suites are collections of tests within a branch, often corresponding to a specific feature or requirement. Suites can be nested and organized hierarchically to reflect the structure of your application or test plan.
Managing Suites
To manage suites:
Go to the Tests screen. To add a suite, click the Add Suite button, name the suite, and provide a description. You can nest suites under existing ones if needed.
Additional suite management options include:
- Adding Sub-Suites: Create sub-suites by selecting the Nest Suite Under option.
- Copying, Cutting, and Pasting Suites to reorganize them as needed.
- Renaming or Deleting a Suite directly from the suite’s menu.
- Linking Requirements: This feature creates a dynamic link between the suite and the requirement, automatically updating the requirement’s assigned test list when changes are made.
Tests
A test is a set of steps designed to verify that a specific aspect of your application functions correctly. Tests can be added, modified, and organized within suites.
Managing Tests
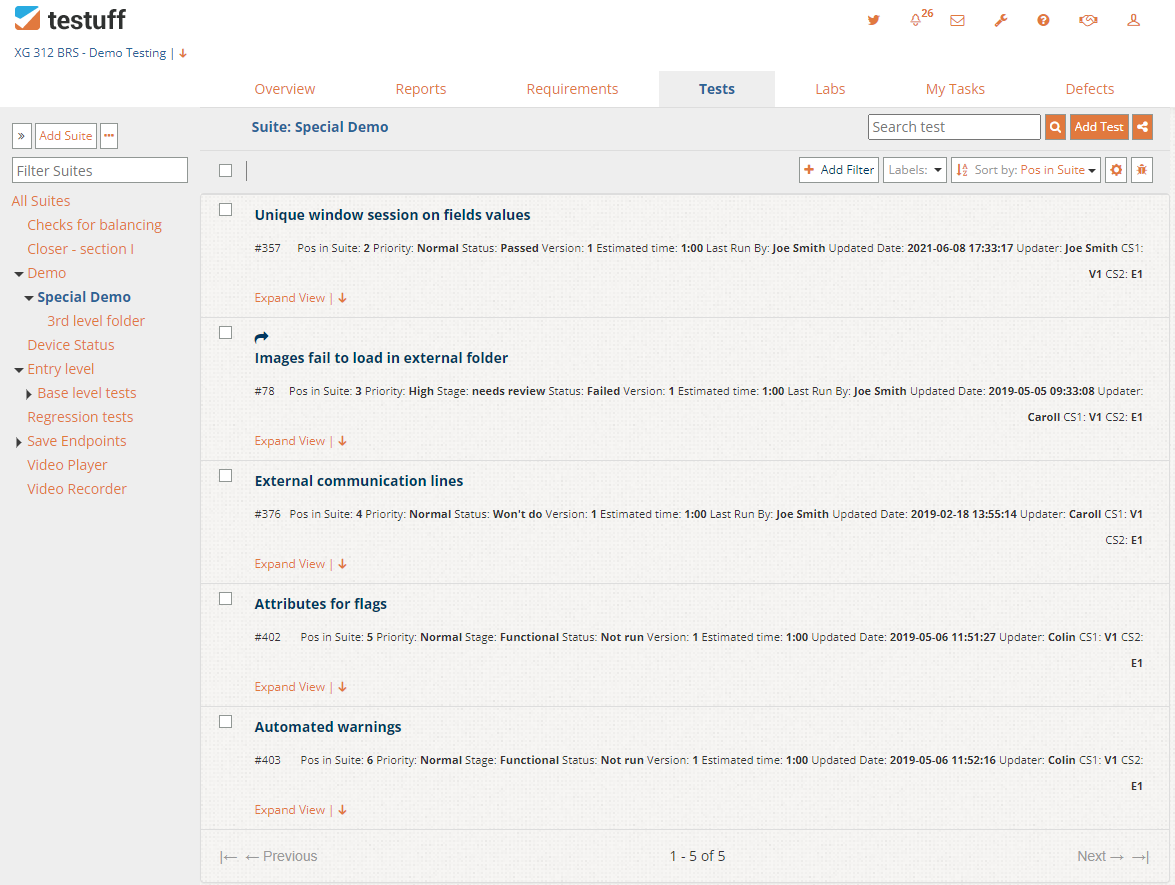
To manage tests navigate to the Tests screen and select the relevant suite. Click Add Test to create a new test.
You can also:
- Import Tests from Excel
- Edit existing tests. Click the test to open it in the Test Editor
- Organize Tests by changing their position within the suite.
- Search for existing Tests across branches or projects using the search icon.
Notes for Desktop Client Users:
- Project and Branch Management: Access these options from the Home icon at the top left.
- Suite and Test Management: Functions similarly across both clients. Use the right-click context menu in the desktop client for quick actions like adding, renaming, or deleting suites and tests.